My neighbor's Tacoma had a factory hood protector, and I liked the idea and look of it. First day I owned my truck I drove down to the nearest Toyota dealership to scope things out. To my surprise, the dealer had a hood protector in stock. Just shootin' the breeze with the parts guy got me ten percent off, $90 out the door. An OEM hood protector was listed as a $119 option on a new truck.
Against my better judgment, I decided to go ahead and do this trim work outside in freezing weather. Working with hard, brittle plastic body parts goes better in the summer. I learned that the hard way when I replaced all the factory moldings on my z32. But my truck was brand new to me and I was impatient to personalize it.
Here is the simple install in nauseating detail. What I thought would be a quick thirty minute screw-on app took half a day because the new black plastic screw inserts would just spin when I pressed them into the sheet metal holes under the hood. The "Super Glue and heat gun fix" took me awhile to figure out, which is the main reason this page exists. Maybe it can help the next guy from becoming as frustrated as I did.
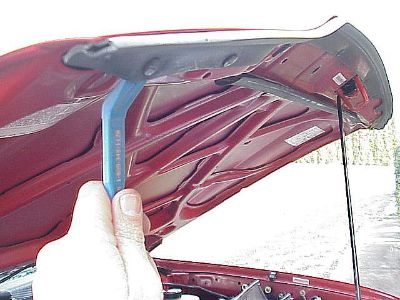
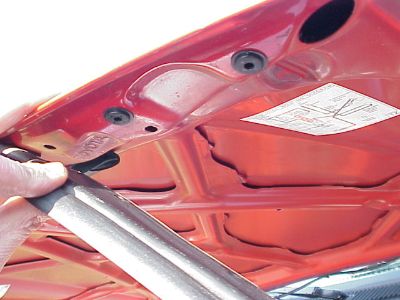
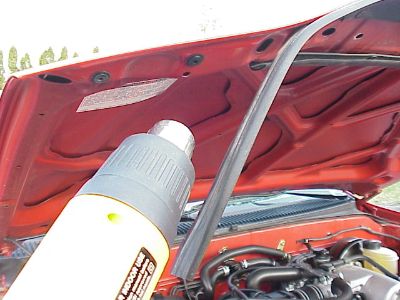
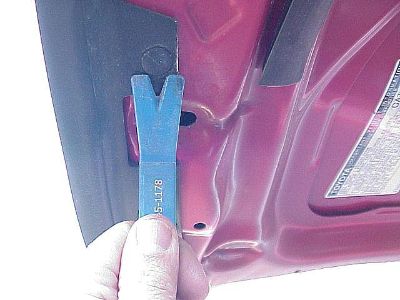 Prop hood partially open for best height to do the work. This is the underside of the front edge of the hood. Nylon pry tool, which you can buy here. Prop hood partially open for best height to do the work. This is the underside of the front edge of the hood. Nylon pry tool, which you can buy here.
Once you own a nice set of nylon pry tools, you will wonder how you ever got along without them.
 The new hood protector is installed between the old rubber gasket and the hood. Not all of the old fasteners are removed, just the ones that match up to the hood protector. The new hood protector is installed between the old rubber gasket and the hood. Not all of the old fasteners are removed, just the ones that match up to the hood protector.
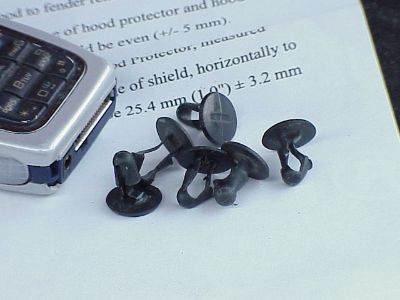 Six old fasteners pried loose, which are replaced by new plastic screw inserts that came with the hood protector. Yeah, I saved the old pieces. Six old fasteners pried loose, which are replaced by new plastic screw inserts that came with the hood protector. Yeah, I saved the old pieces.
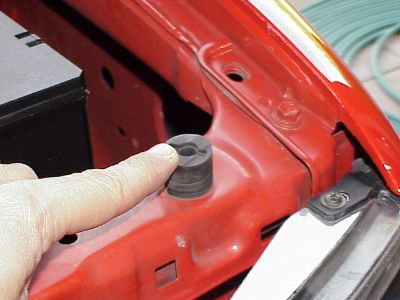
 These new black plastic inserts with rubber washers would just spin when pushed into place under the hood. Therefore, the new screws would not bite and the install was temporarily stalled. These new black plastic inserts with rubber washers would just spin when pushed into place under the hood. Therefore, the new screws would not bite and the install was temporarily stalled.
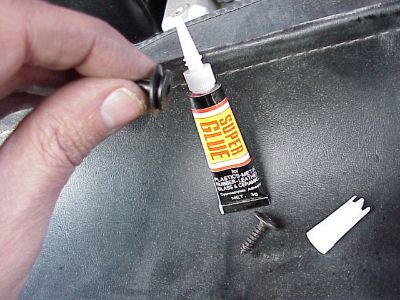 I fixed this by using Super Glue and a heat gun. Place a small drop of glue on both sides of the rubber washer next to my fingers. I fixed this by using Super Glue and a heat gun. Place a small drop of glue on both sides of the rubber washer next to my fingers.
Guess how much a five pack of Super Glue costs at the Dollar Store? I always keep some on hand.
 After applying the Super Glue, push the new plastic screw insert into place under the hood. Hold pressure on the insert for a minute or two with a stick or something. After applying the Super Glue, push the new plastic screw insert into place under the hood. Hold pressure on the insert for a minute or two with a stick or something.
Rubber gasket is still hanging on by four of the old fasteners.
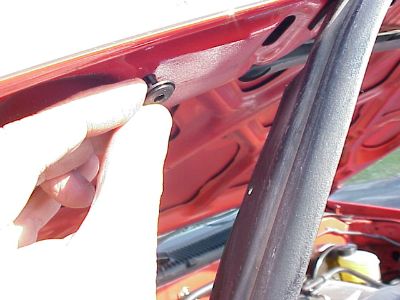
 Hit each glued insert right away with a heat gun. Better yet, use the heat gun at the same time pressure is being applied to the insert with a stick or screwdriver. I had to use my free hand to hold the camera, lol. Hit each glued insert right away with a heat gun. Better yet, use the heat gun at the same time pressure is being applied to the insert with a stick or screwdriver. I had to use my free hand to hold the camera, lol.
Be careful, this is not your sister's blow dryer. This tool will melt paint. Carefully gauge the heat with your fingers near the hood. So really you need three hands, lol.
I'm not sure if the heat gun would be necessary in the summer. I could not get the Super Glue to stick in the freezing weather without using the heat gun.
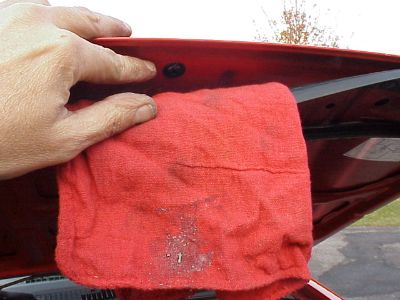 Protect the rubber gasket from the heat gun with a shop rag when working on this insert. Protect the rubber gasket from the heat gun with a shop rag when working on this insert.
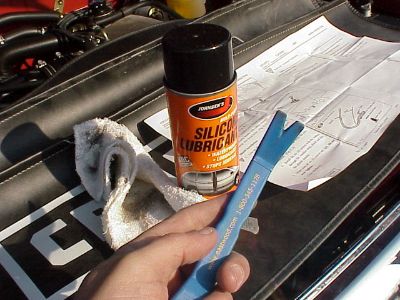 Clean the rubber gasket with silicone spray. Spray on rag, then wipe it down. Work with a cover over engine bay so dropped parts and screws don't disappear. Clean the rubber gasket with silicone spray. Spray on rag, then wipe it down. Work with a cover over engine bay so dropped parts and screws don't disappear.
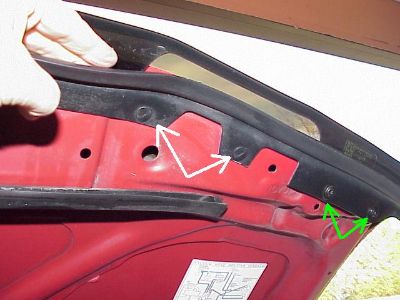 After install, white arrows show old fasteners left behind. Green arrows show new inserts and screws. Underside of the new smoked plastic hood protector is touching the back of my hand. After install, white arrows show old fasteners left behind. Green arrows show new inserts and screws. Underside of the new smoked plastic hood protector is touching the back of my hand.
 If necessary, these hood bumper stops on the corners can be turned to adjust the closing height of the hood after the install. If necessary, these hood bumper stops on the corners can be turned to adjust the closing height of the hood after the install.
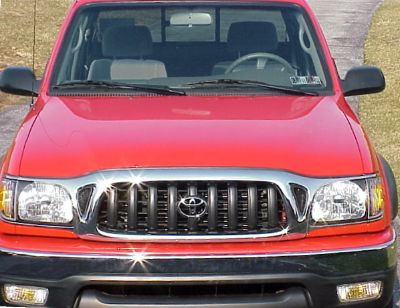 before before
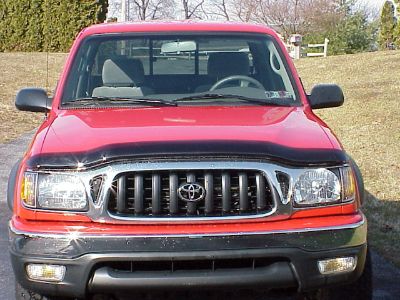 after after
|