A couple of little tricks here worth mentioning. After squeezing two girls with high heels into my passenger seat, I found this the next day.
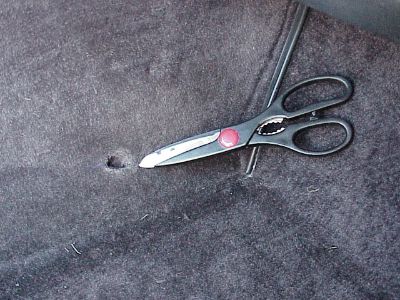 This was not acceptable, since my interior up to that point was flawless, no rips, no tears. This was not acceptable, since my interior up to that point was flawless, no rips, no tears.
Tools needed
- scissors
- carpet scrap from under seat or old floor mat
- hair clippers or fine detail scissors
- Exacto knife
I had an extra, old car mat lying around.
 The color match was close enough that I decided to use it to make a patch for the hole. The color match was close enough that I decided to use it to make a patch for the hole.
I cut a piece from the floor mat to make my "patch." The piece was about three times bigger than the hole.
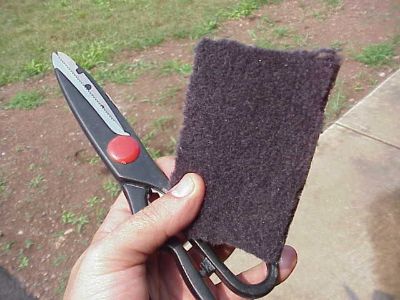
 That's my beard trimmer, lol. Small detail scissors can be used instead but a new electric clipper is only about twenty bucks. I "plateaued" the patch as shown. here. Then it will fill and blend in perfectly with the edges of the hole, from behind. That's my beard trimmer, lol. Small detail scissors can be used instead but a new electric clipper is only about twenty bucks. I "plateaued" the patch as shown. here. Then it will fill and blend in perfectly with the edges of the hole, from behind.
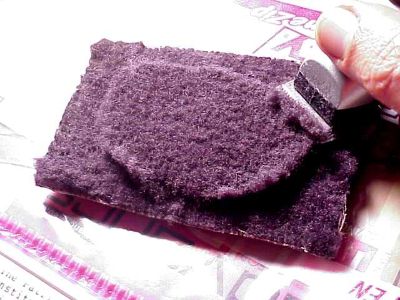
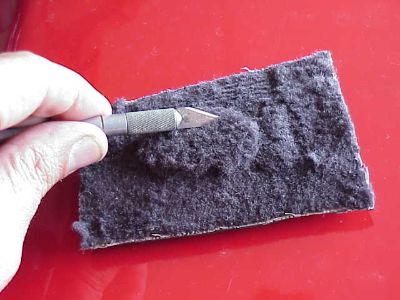 I took an Exacto knife to the loop pile of and turned it into cut pile but running the blade upside down through the patch. I took an Exacto knife to the loop pile of and turned it into cut pile but running the blade upside down through the patch.
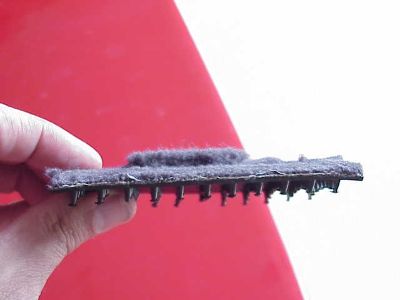 One nice bonus about using my old floor mat was that the back of the patch had theses little rubber pegs which held the patch in place. One nice bonus about using my old floor mat was that the back of the patch had theses little rubber pegs which held the patch in place.
.
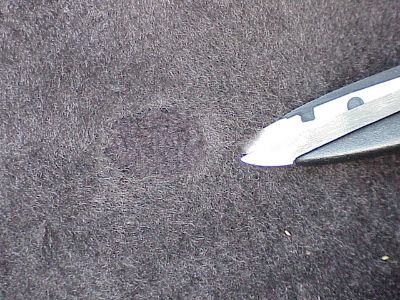 This close up view still shows the difference in the carpet naps, but the repair is barely noticeable from a normal distance. This close up view still shows the difference in the carpet naps, but the repair is barely noticeable from a normal distance.

I felt I could make the patch look even better by using a matching donar piece of carpet from under the seat. So the next time I had my seats out of the car, I cut a small patch from the original carpet that will never show. A car's interior is a dark and shadowy place, and no one has ever noticed. This repair is almost invisible.
 Now the nap and the color match exactly. The hole was built up from the previoius repair. I simply glued this patch in place over top of it. I used black RTV silicone and obviously, I was VERY careful not to get the glue on any part of the carpet pile. This was a noticeable improvement. Now the nap and the color match exactly. The hole was built up from the previoius repair. I simply glued this patch in place over top of it. I used black RTV silicone and obviously, I was VERY careful not to get the glue on any part of the carpet pile. This was a noticeable improvement.
Before trying this, I went to a couple of car interior shops for estimates. One shop wanted to replace the whole carpet ($$$). One guy who did custom restorations said he would hand stitch a patch in for me for around $80. This job took about 30 minutes and it was free.
|