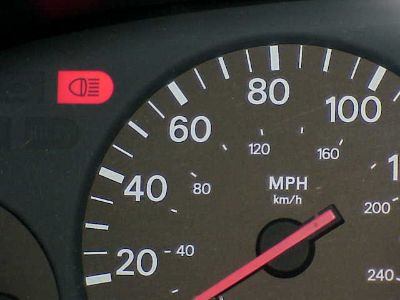
After installing my Kaminari rear spoiler with its 60 LED third brakelight, the brake idiot light behind the instrument cluster came on every time I touched the brake. The proper function of this light is to inform the driver when a brakelight has burned out, or that the brake fluid level is low.
I quickly became used to this light going on and off all the time, but I grew tired of passengers asking me what was wrong when they noticed the same thing. My favorite answer became, "Omigod, no brakes!" while wildly stamping my foot on the floorboard ;c)
Anywho, I thought about Ohm's Law a bit, and then tried putting in lots of different sized resistors in the wiring, in parallel and series, to the LED's back under the hatch. LED's have very low to no resistance on their own. Changing the current flowing through the LED by adding a resistor will dim the brightness of the LED. The larger the resistor, the dimmer the LED's will become.
Be careful when using smaller resistors because they will get hot. At one point during my experiment, the interior of my car started filling with smoke during a test drive from a burning resistor temporarily resting on my cargo cover. This was a bit disconcerting to say the least. I was able to get the dash light to function properly, but only when the LED's became so dim from the large, hot-dog sized resistor I was using that it made the effort pointless. I came to the conclusion that having the remaining incandescent brake lights and these LED lights in the same circuit pretty much excluded keeping the idiot light functional. After removing this idiot light in the dash, the condition of the brake lights, and the level of the brake fluid in the brake master cylinder should be checked regularly. This is not particularly burdensome, but should be kept in mind.
So I decided to pull the dash light, which turned out to be a little trickier than I first thought. Pulling the gauge cluster in not that hard. In fact, you can take the whole instrument cluster out using just one Phillips screwdriver. I like to disconnect my battery whenever I'm removing the gauge cluster.
Here is a good link to gauge cluster removal. You can see in the final pics of that link that there are bulbs visible behind the gauge cluster. Unfortunately, none of those bulbs match up to our problem bulb in the picture above. In order to access that bulb, the clear plastic lens cover has to be separated from the white plastic back of the instrument cluster.
This is not that hard to do, just a little delicate. There are a couple of screws in back that need to be removed. Then use a slotted screwdriver to gently release the clips which are evenly spaced around the edge as shown by the red arrows below.
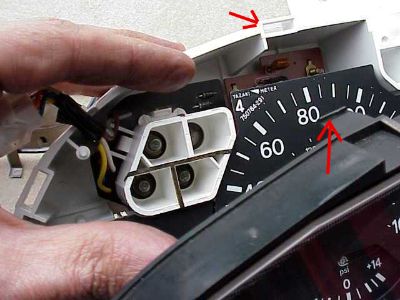
The cover will still be attached by some wires along the bottom edge but you should leave those alone. All that needs to be done is to make enough room to access the cluster of four bulbs shown above and below.
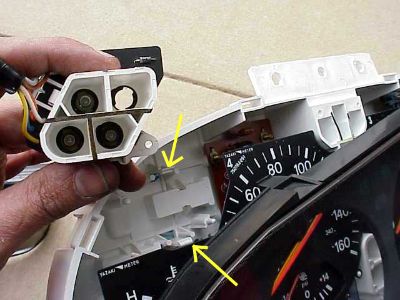
The cluster is released by prying two clips shown by the yellow arrows. The cluster then easily pops out. Unscrew the bulb in the upper, right corner from behind.
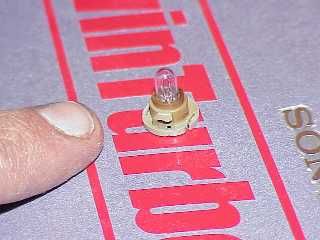 The bulb looks like this once removed. Put everything back together and you're done. The bulb looks like this once removed. Put everything back together and you're done.
|